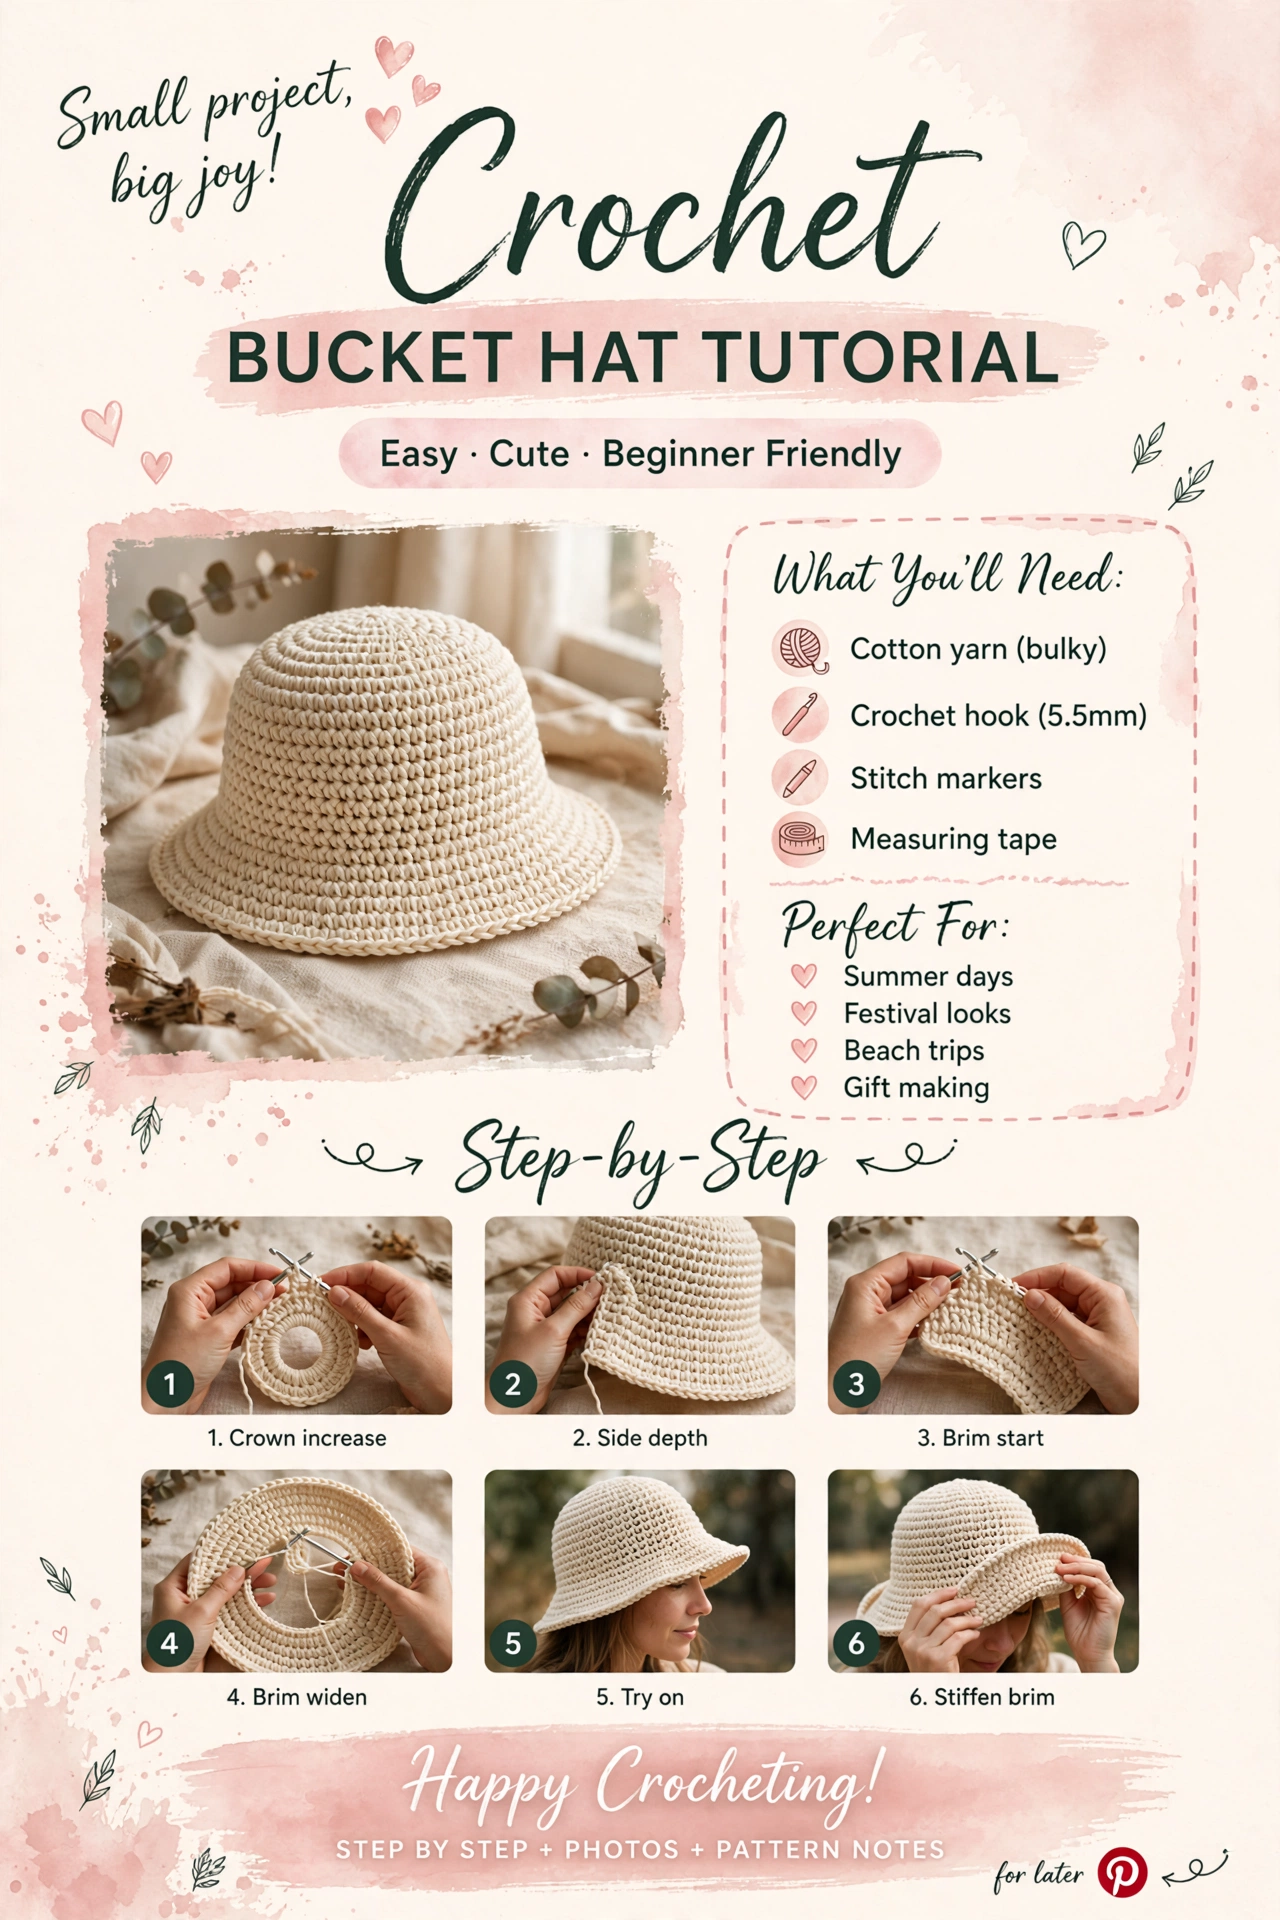
Before You Begin
A crochet bucket hat is a great project when you want something practical, wearable, and relatively quick to make. The shape is built from simple crochet rounds, so you do not need complicated shaping techniques to get started.
The project is worked from the top down. You begin with a small circle for the crown, continue around the sides of the hat, and then gradually increase around the edge to create the characteristic bucket-hat brim.
The most important part is keeping your stitches consistent. If your crown becomes too large, the finished hat may feel loose. If it stays too small, the hat can become tight before you reach the brim.
Complete Tutorial Roadmap
- Choose your yarn and crochet hook.
- Make the adjustable starting ring.
- Build the circular crown.
- Continue the sides without increasing.
- Check the depth and fit.
- Begin widening the brim.
- Shape and finish the brim.
- Weave in the ends and block the hat.
Visual Step-by-Step
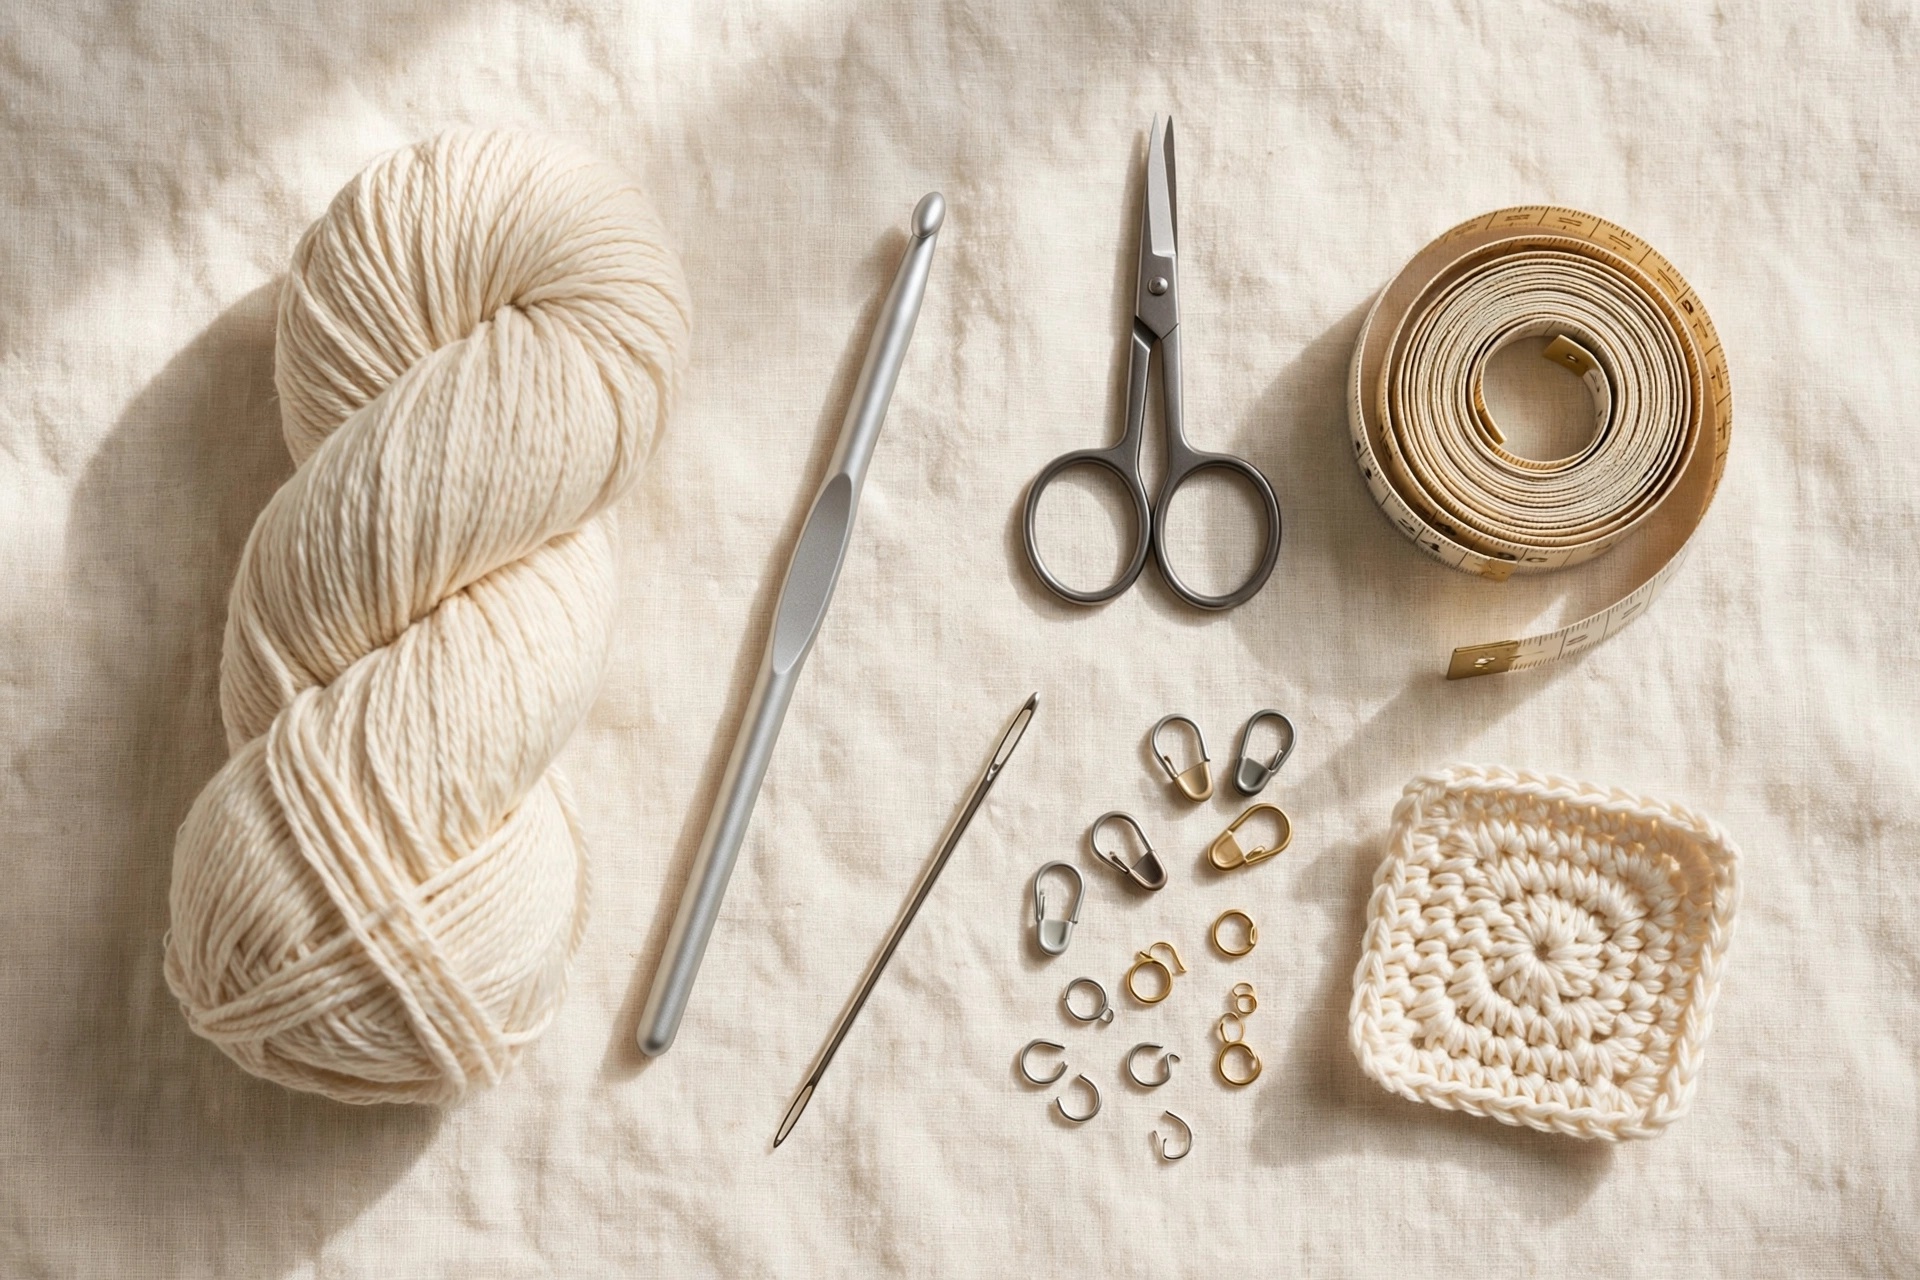
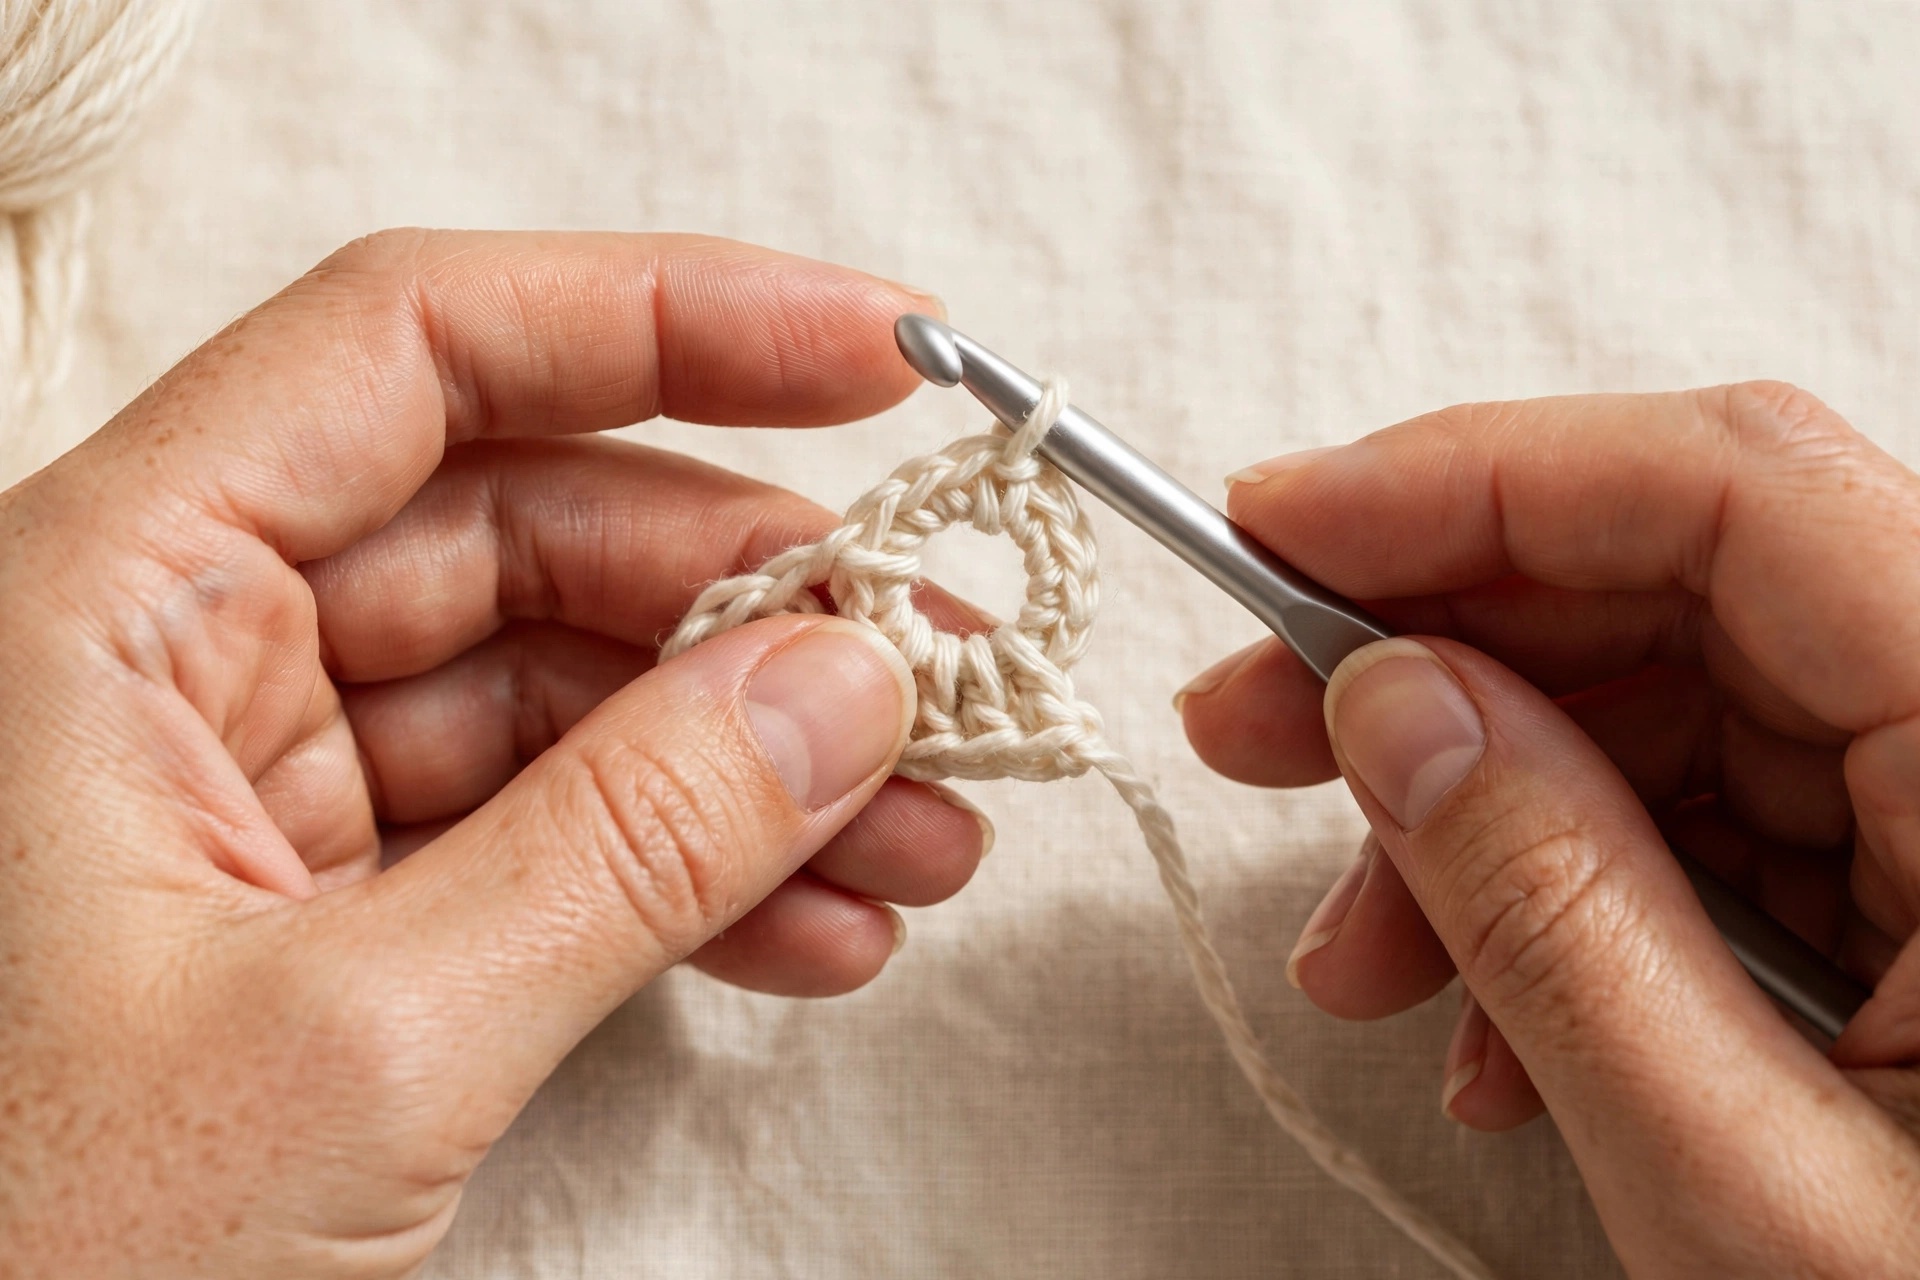
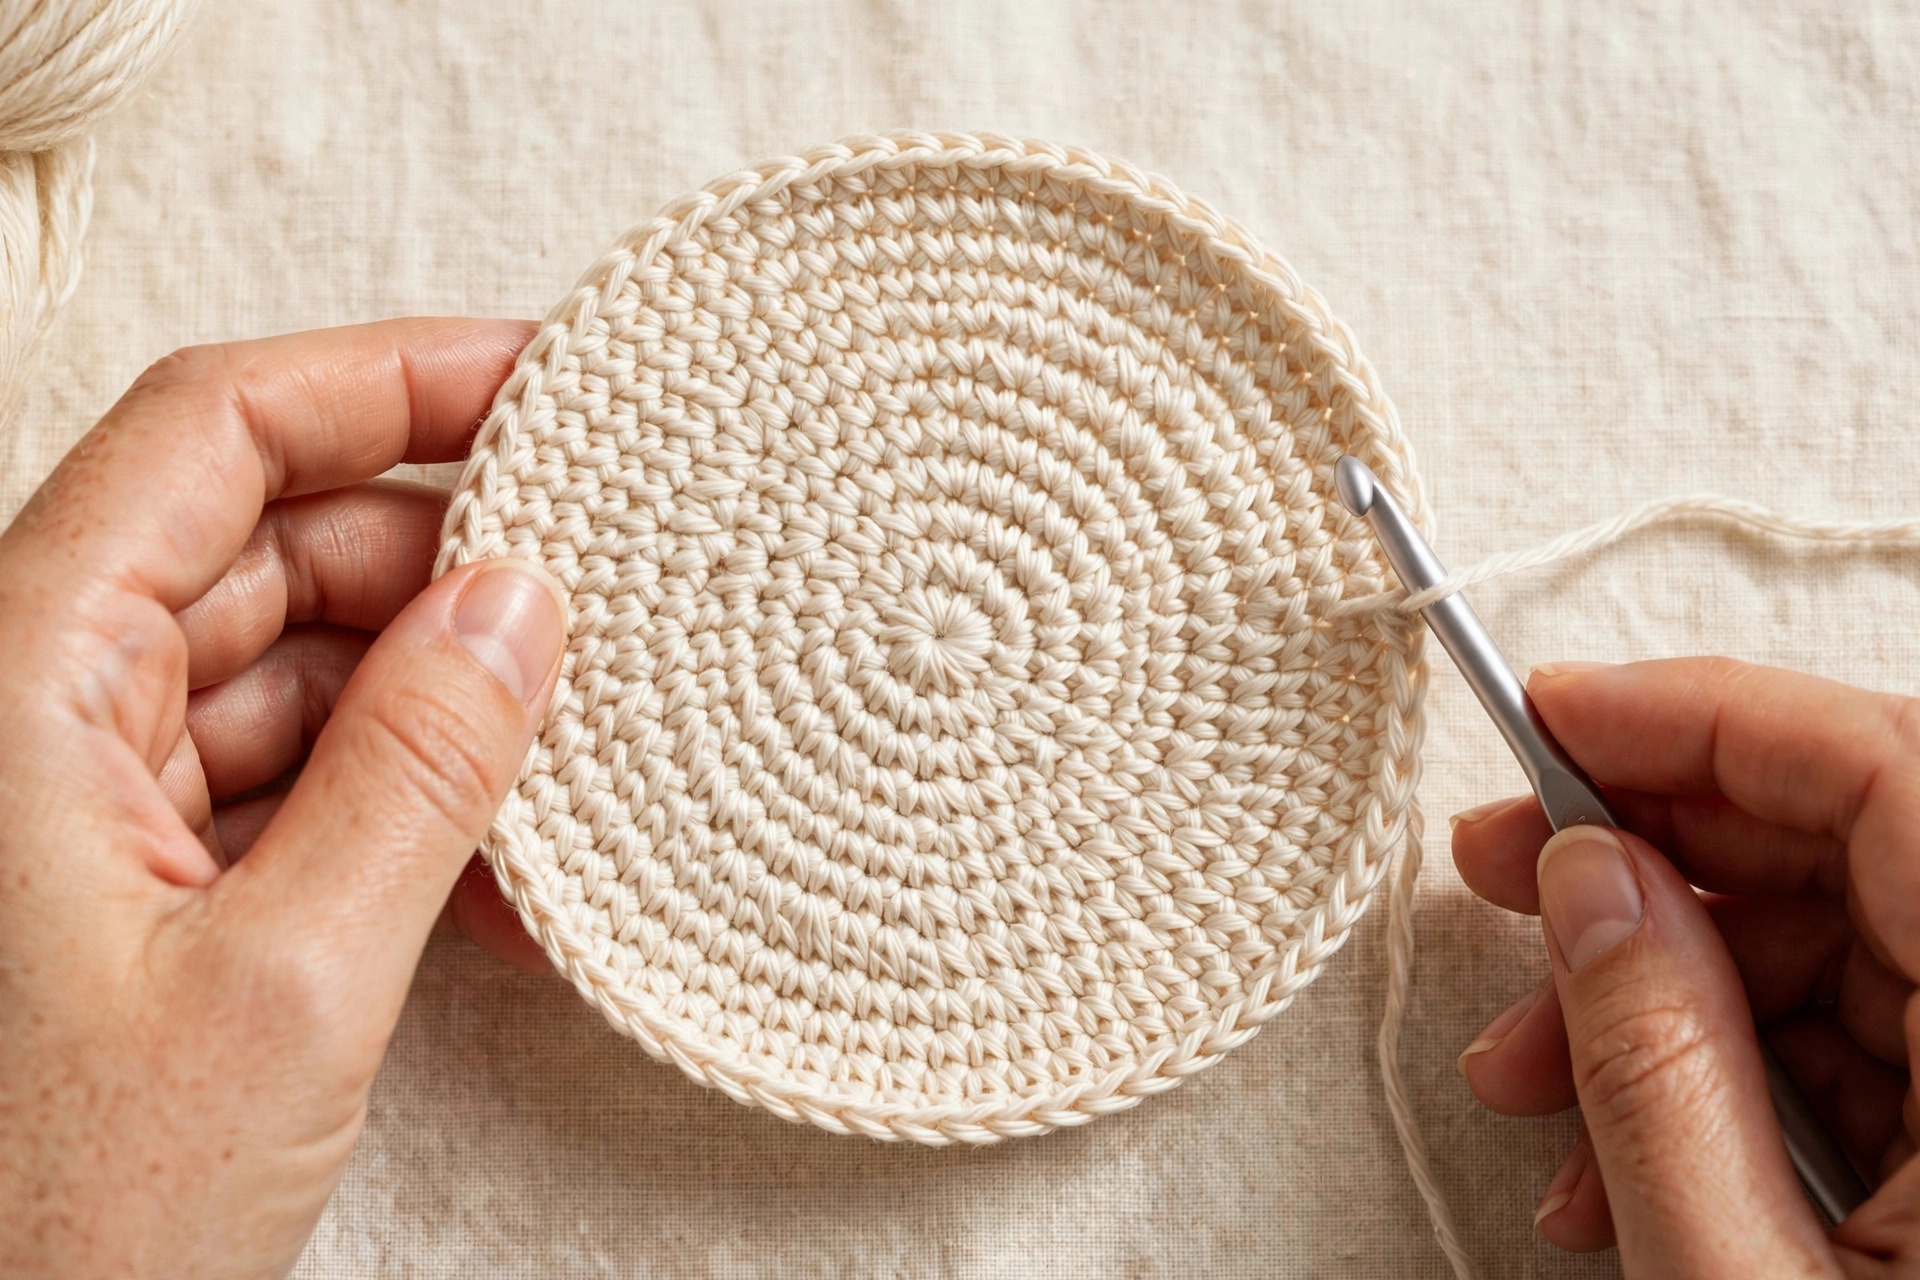
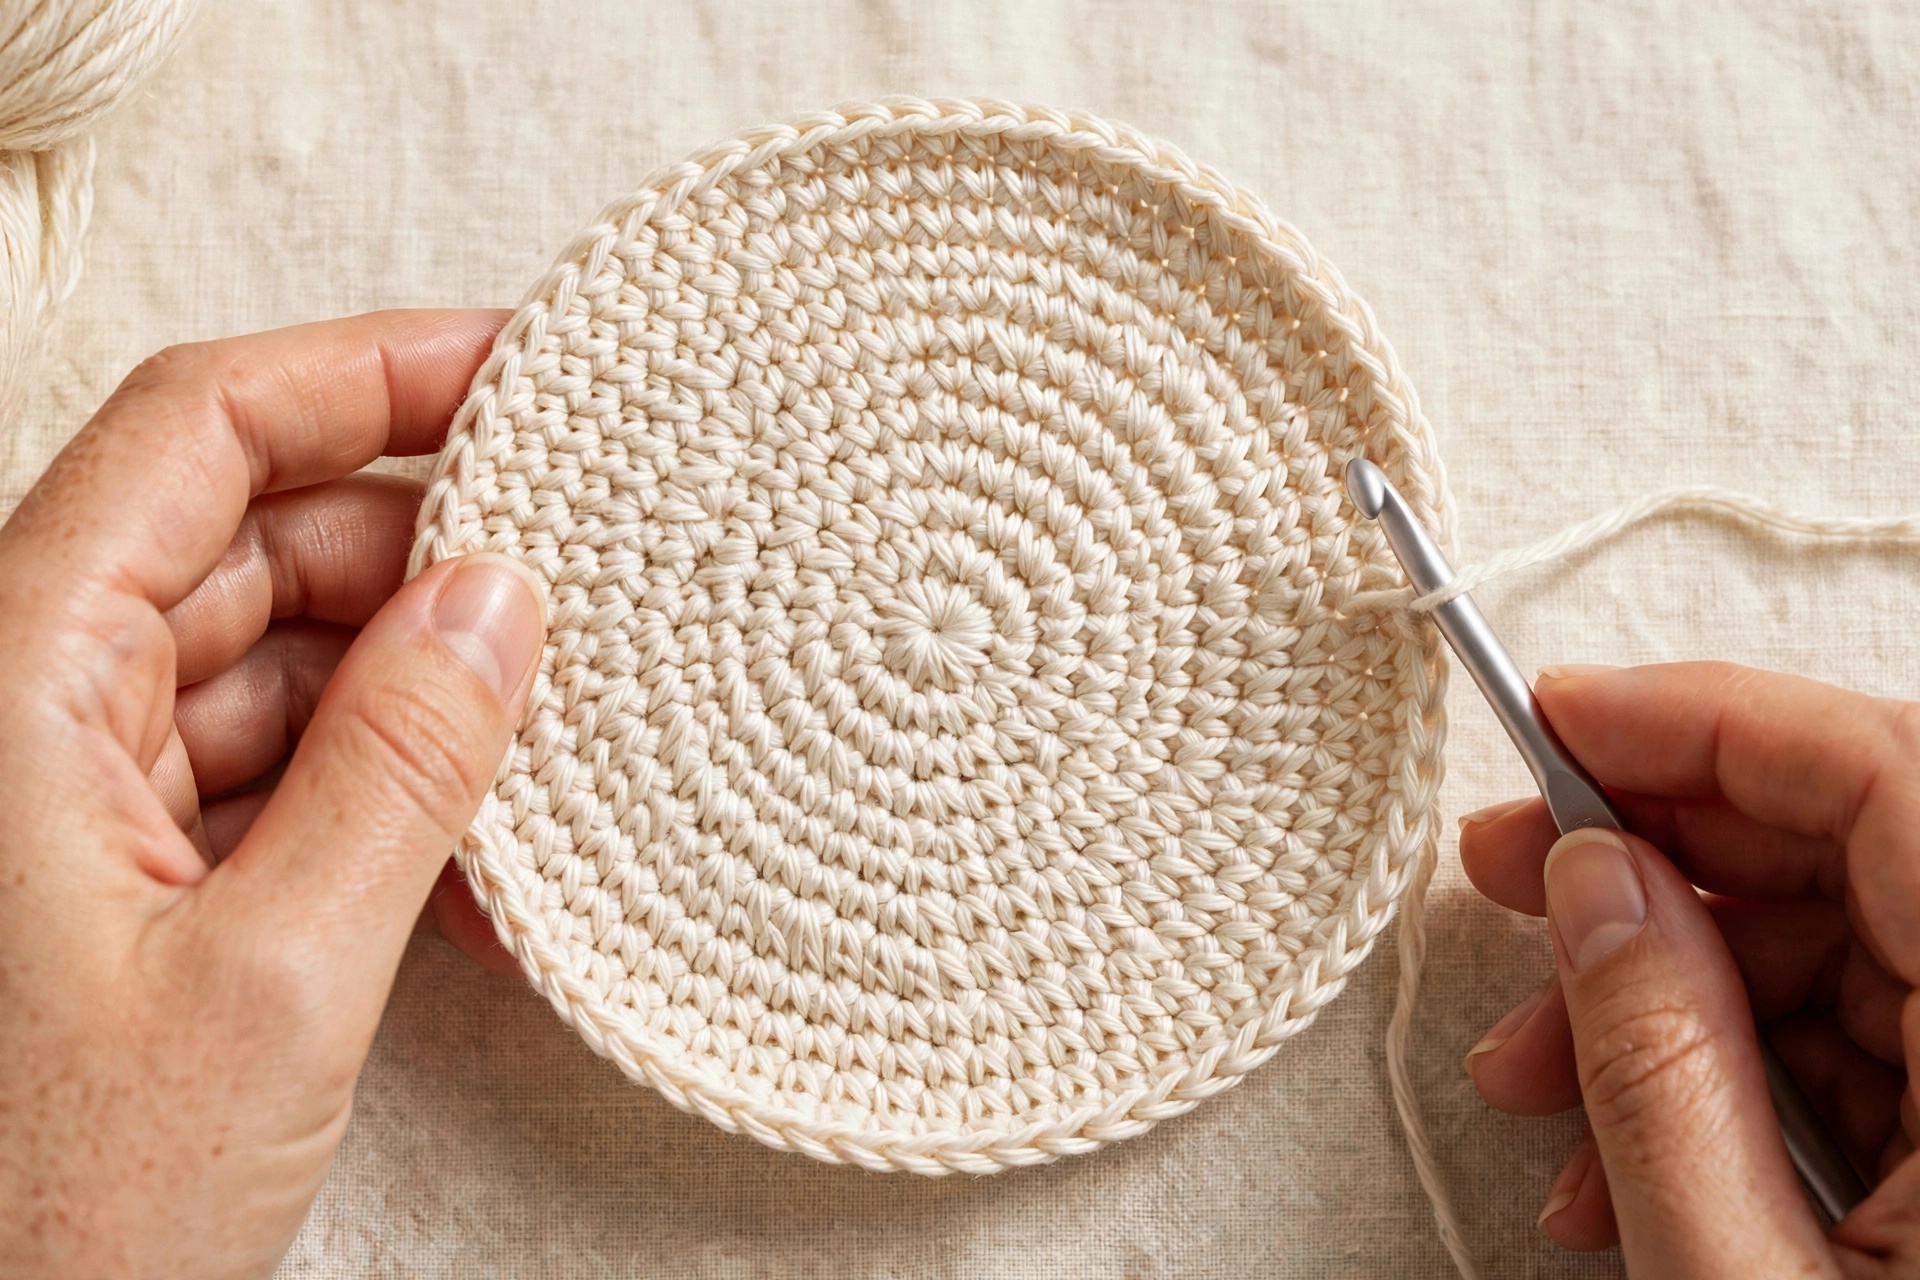
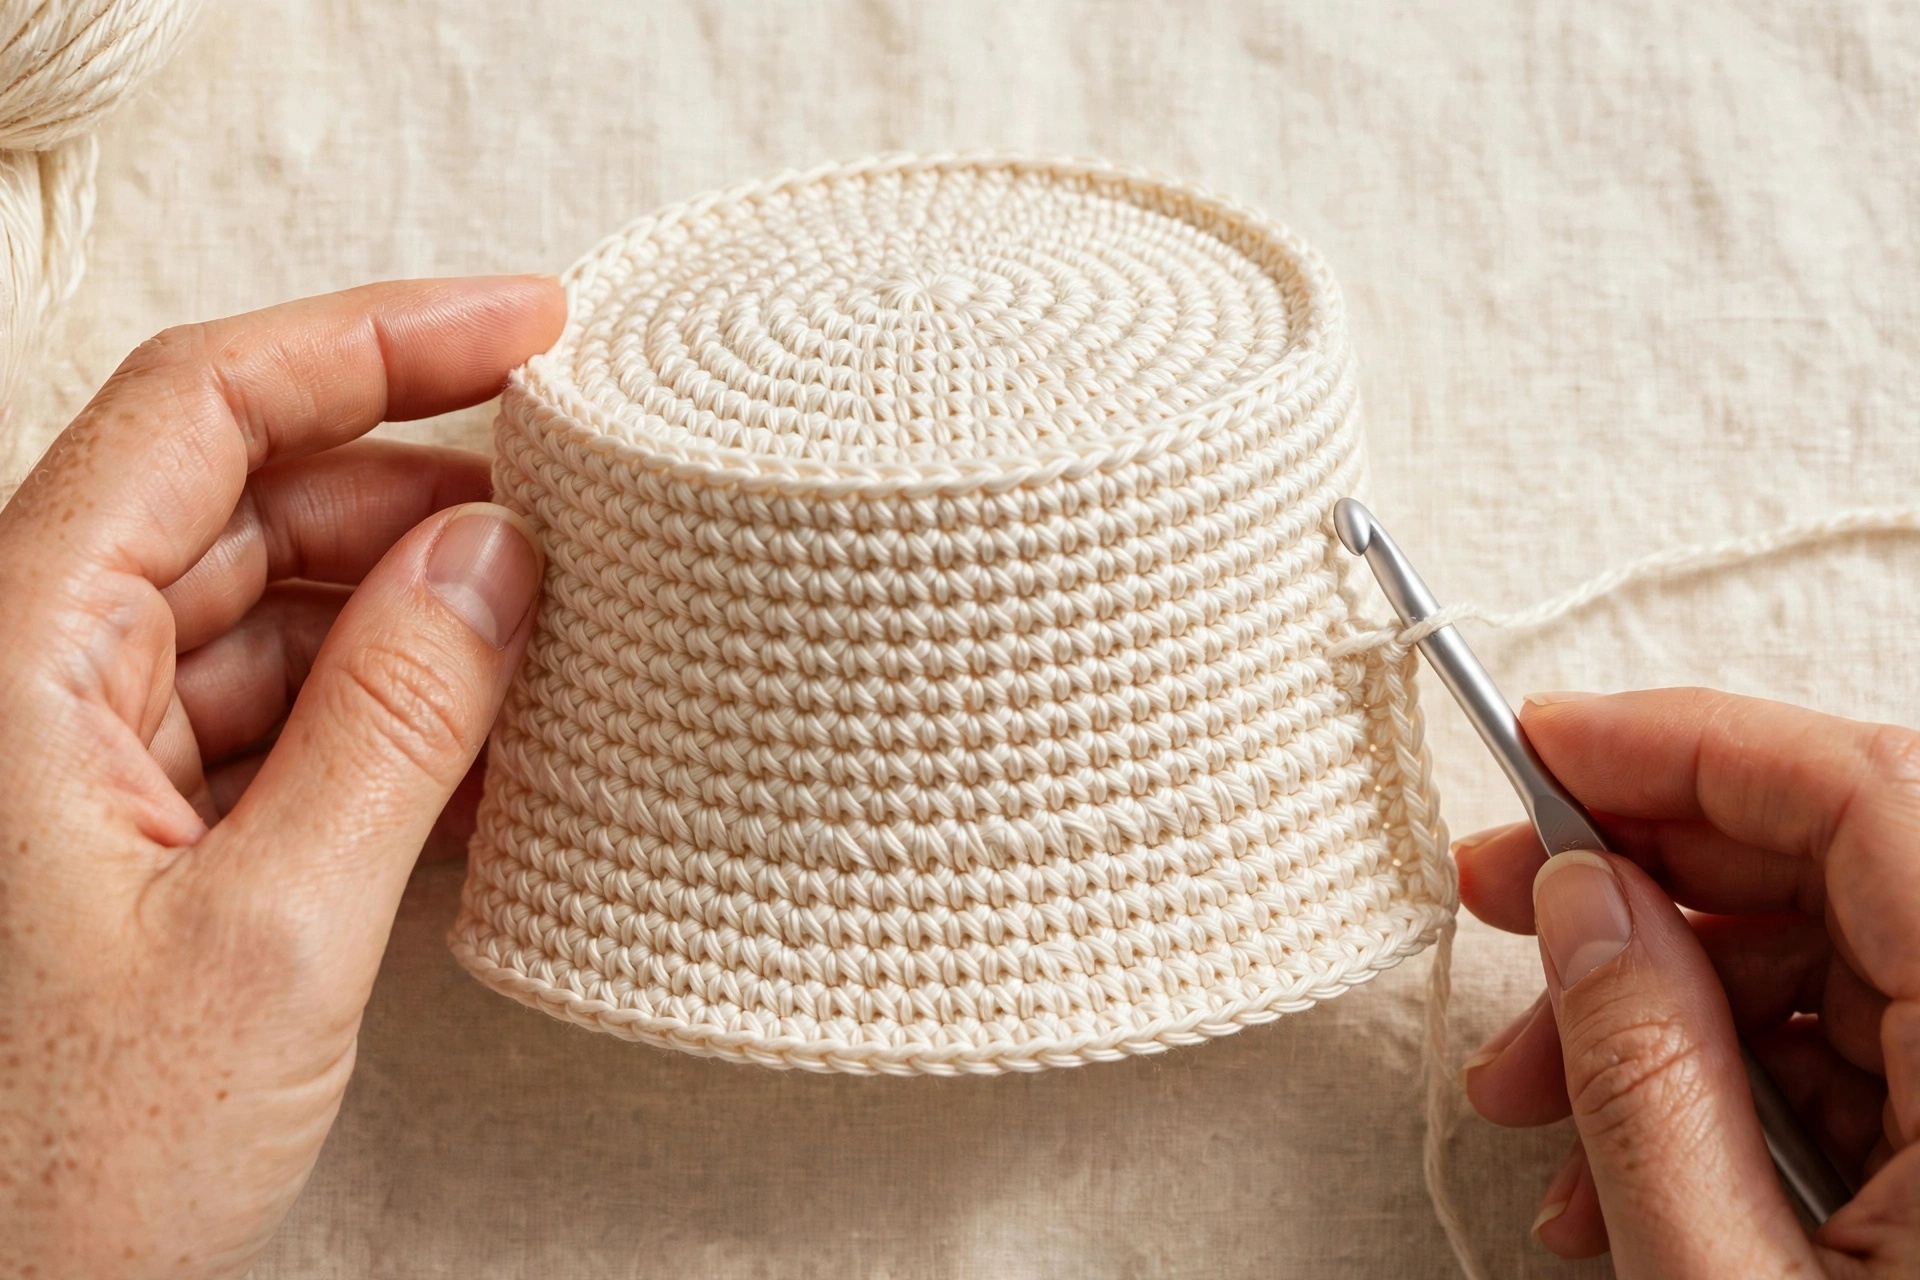
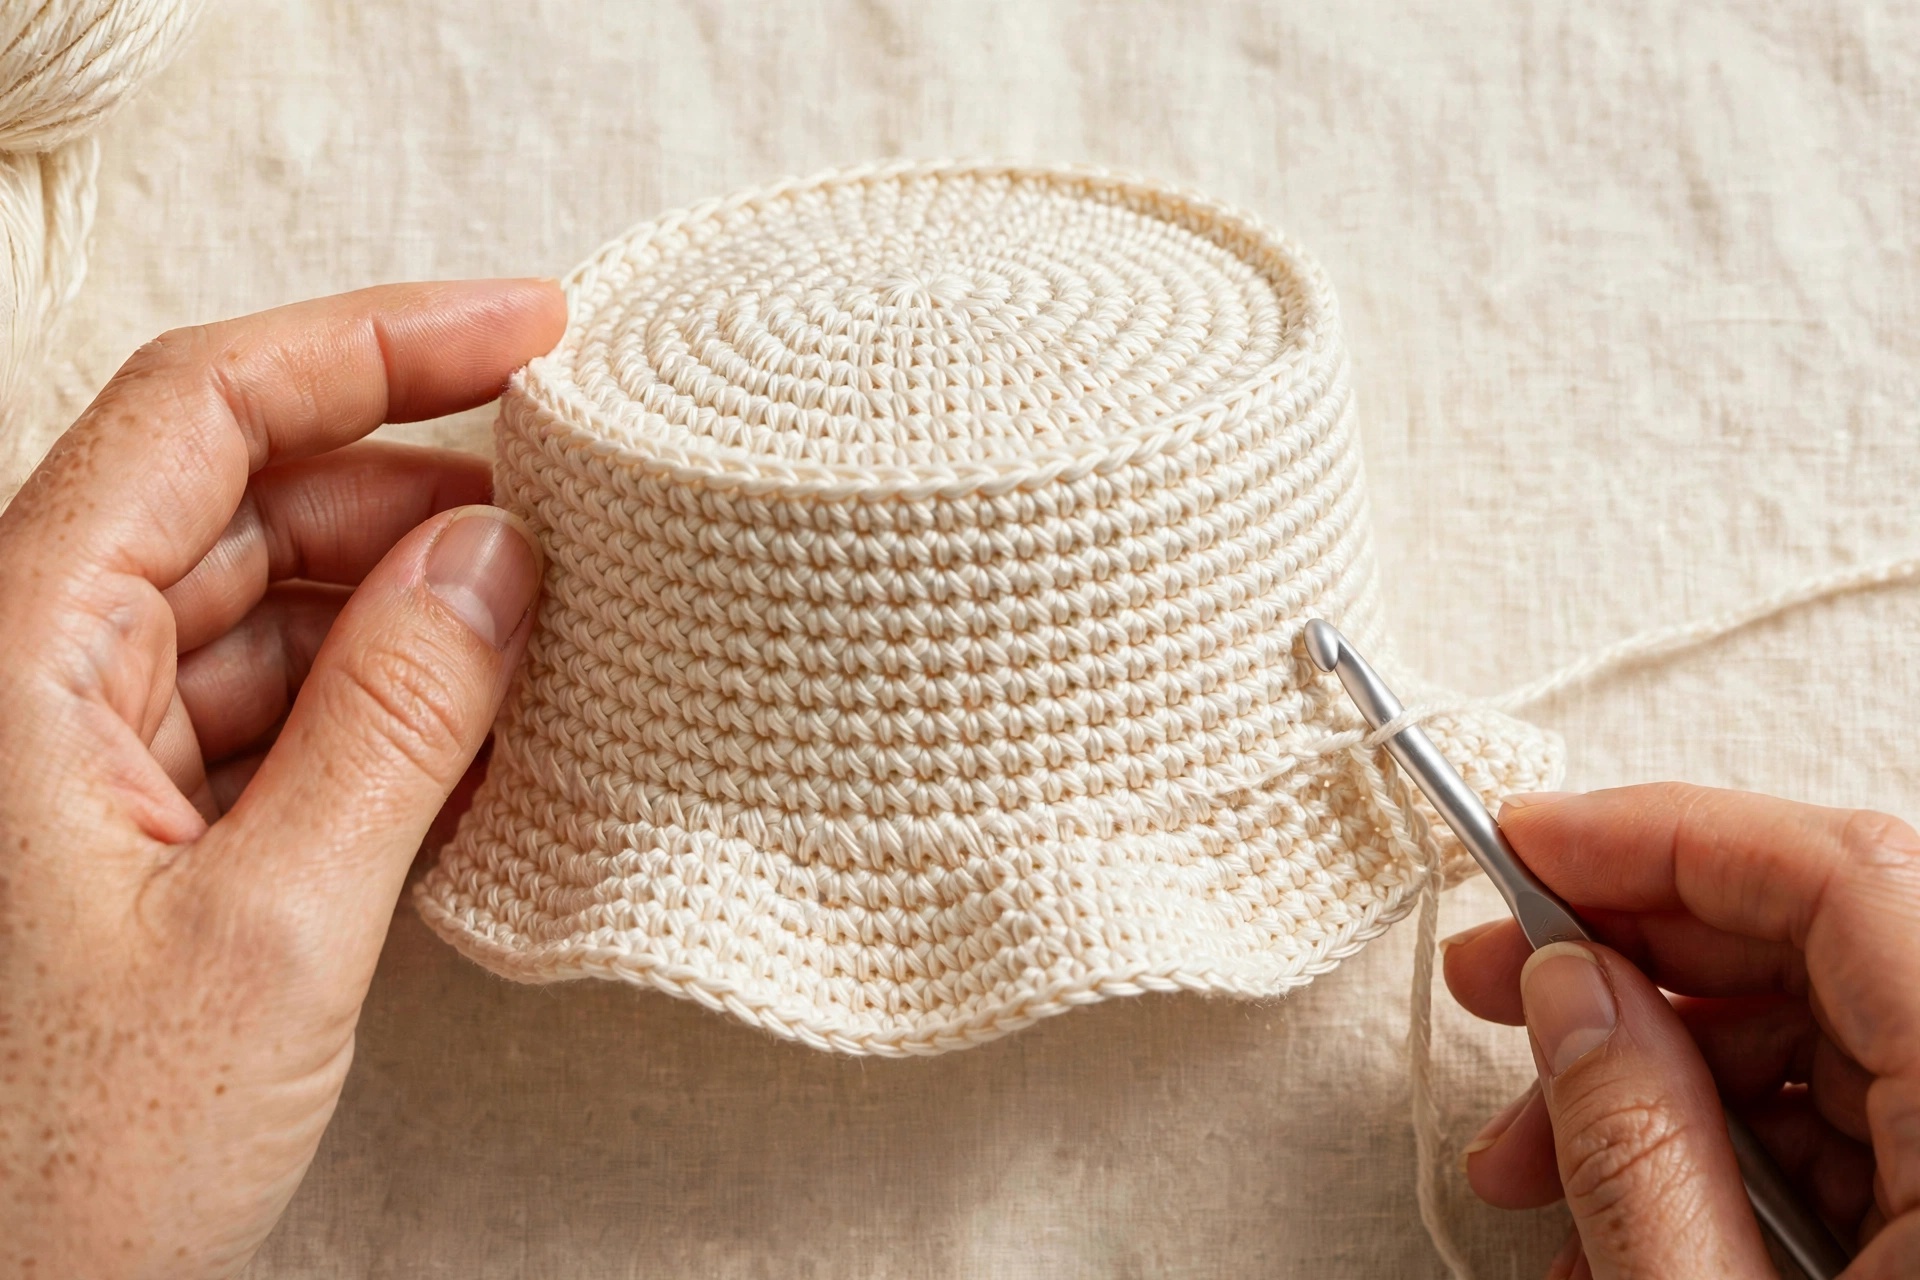
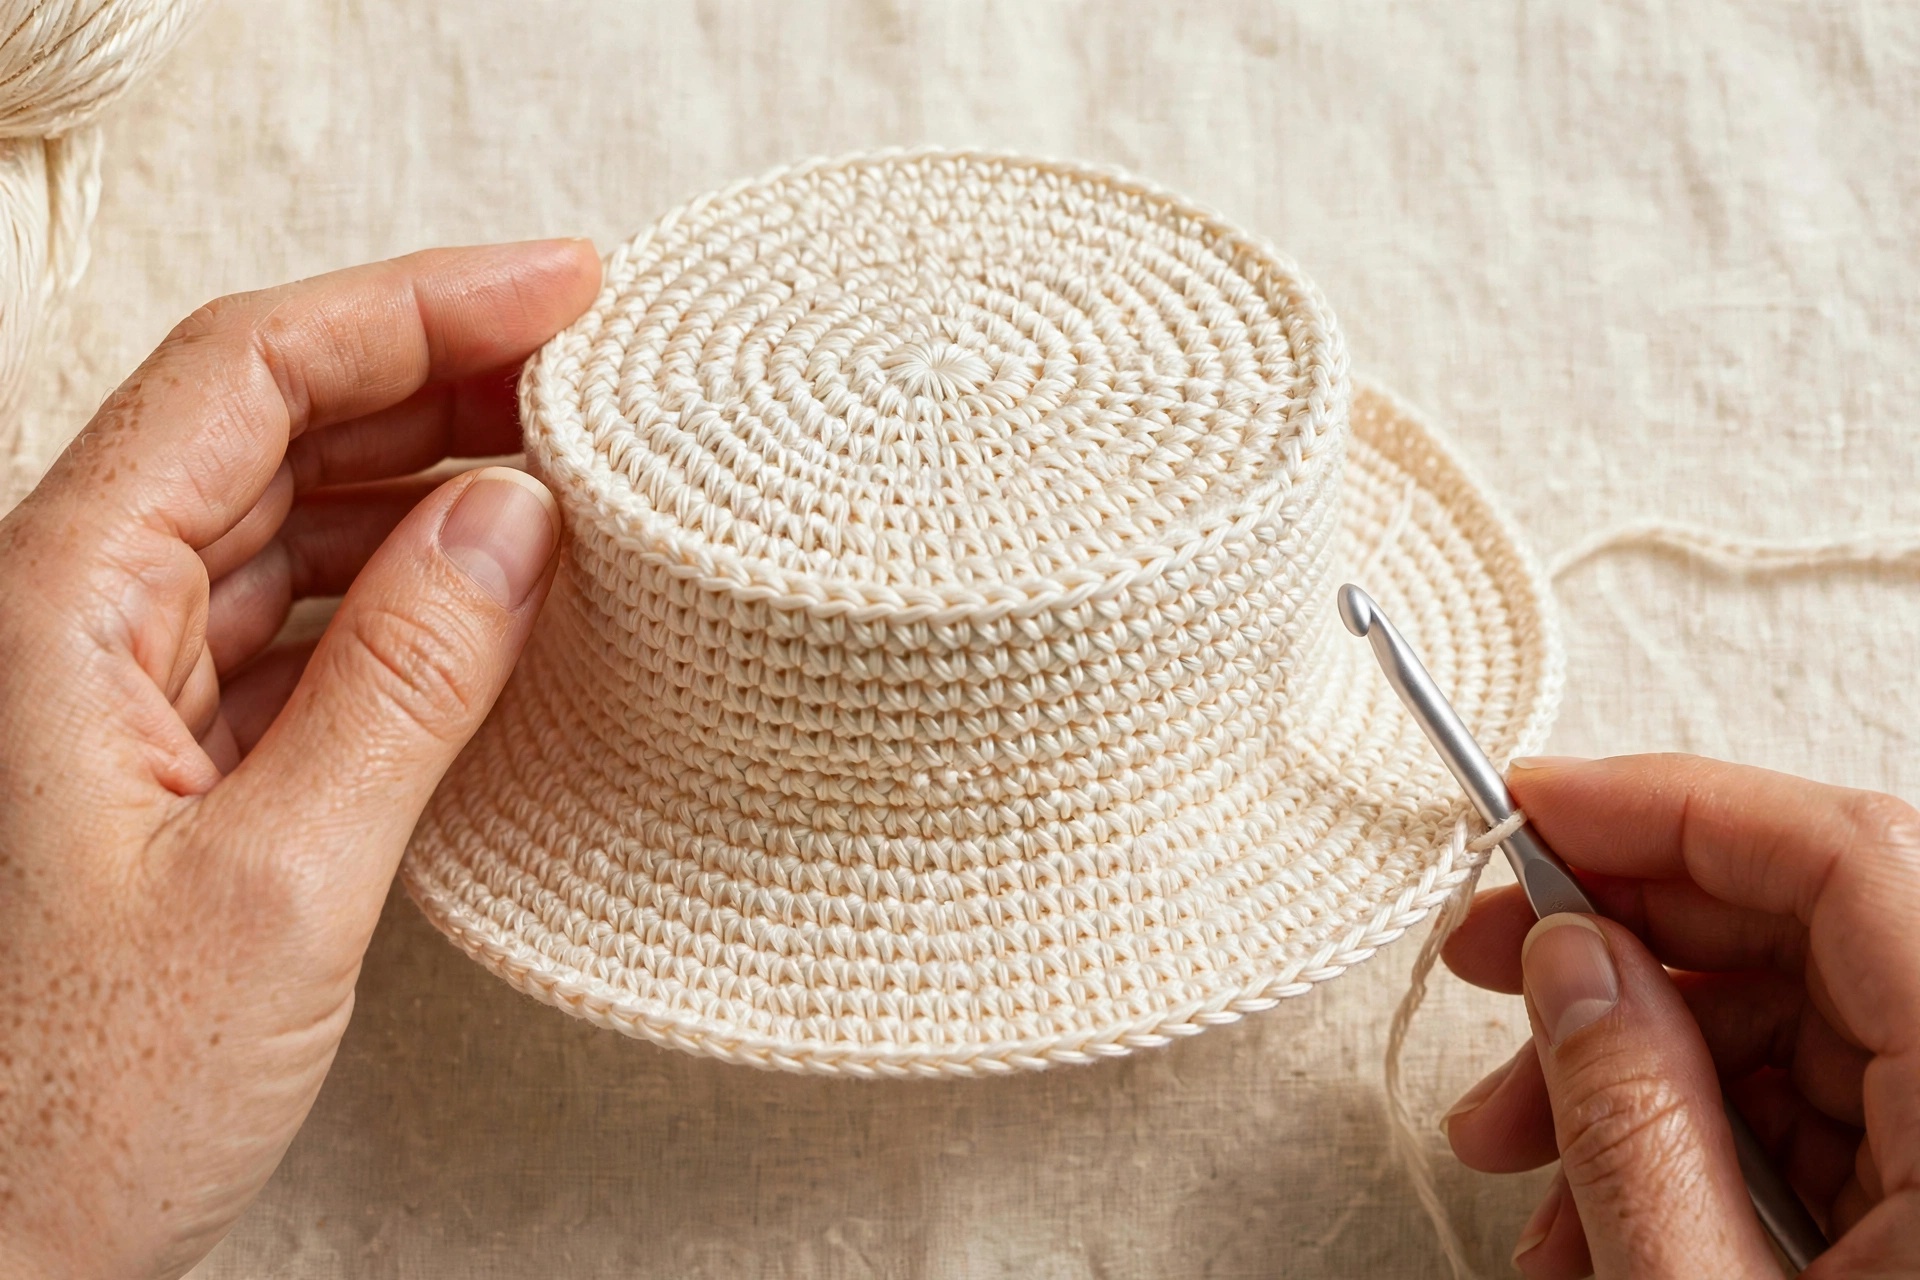
Use these photos as a visual guide while you work. They follow the construction from the materials through the crown, side walls, brim, and finished hat.
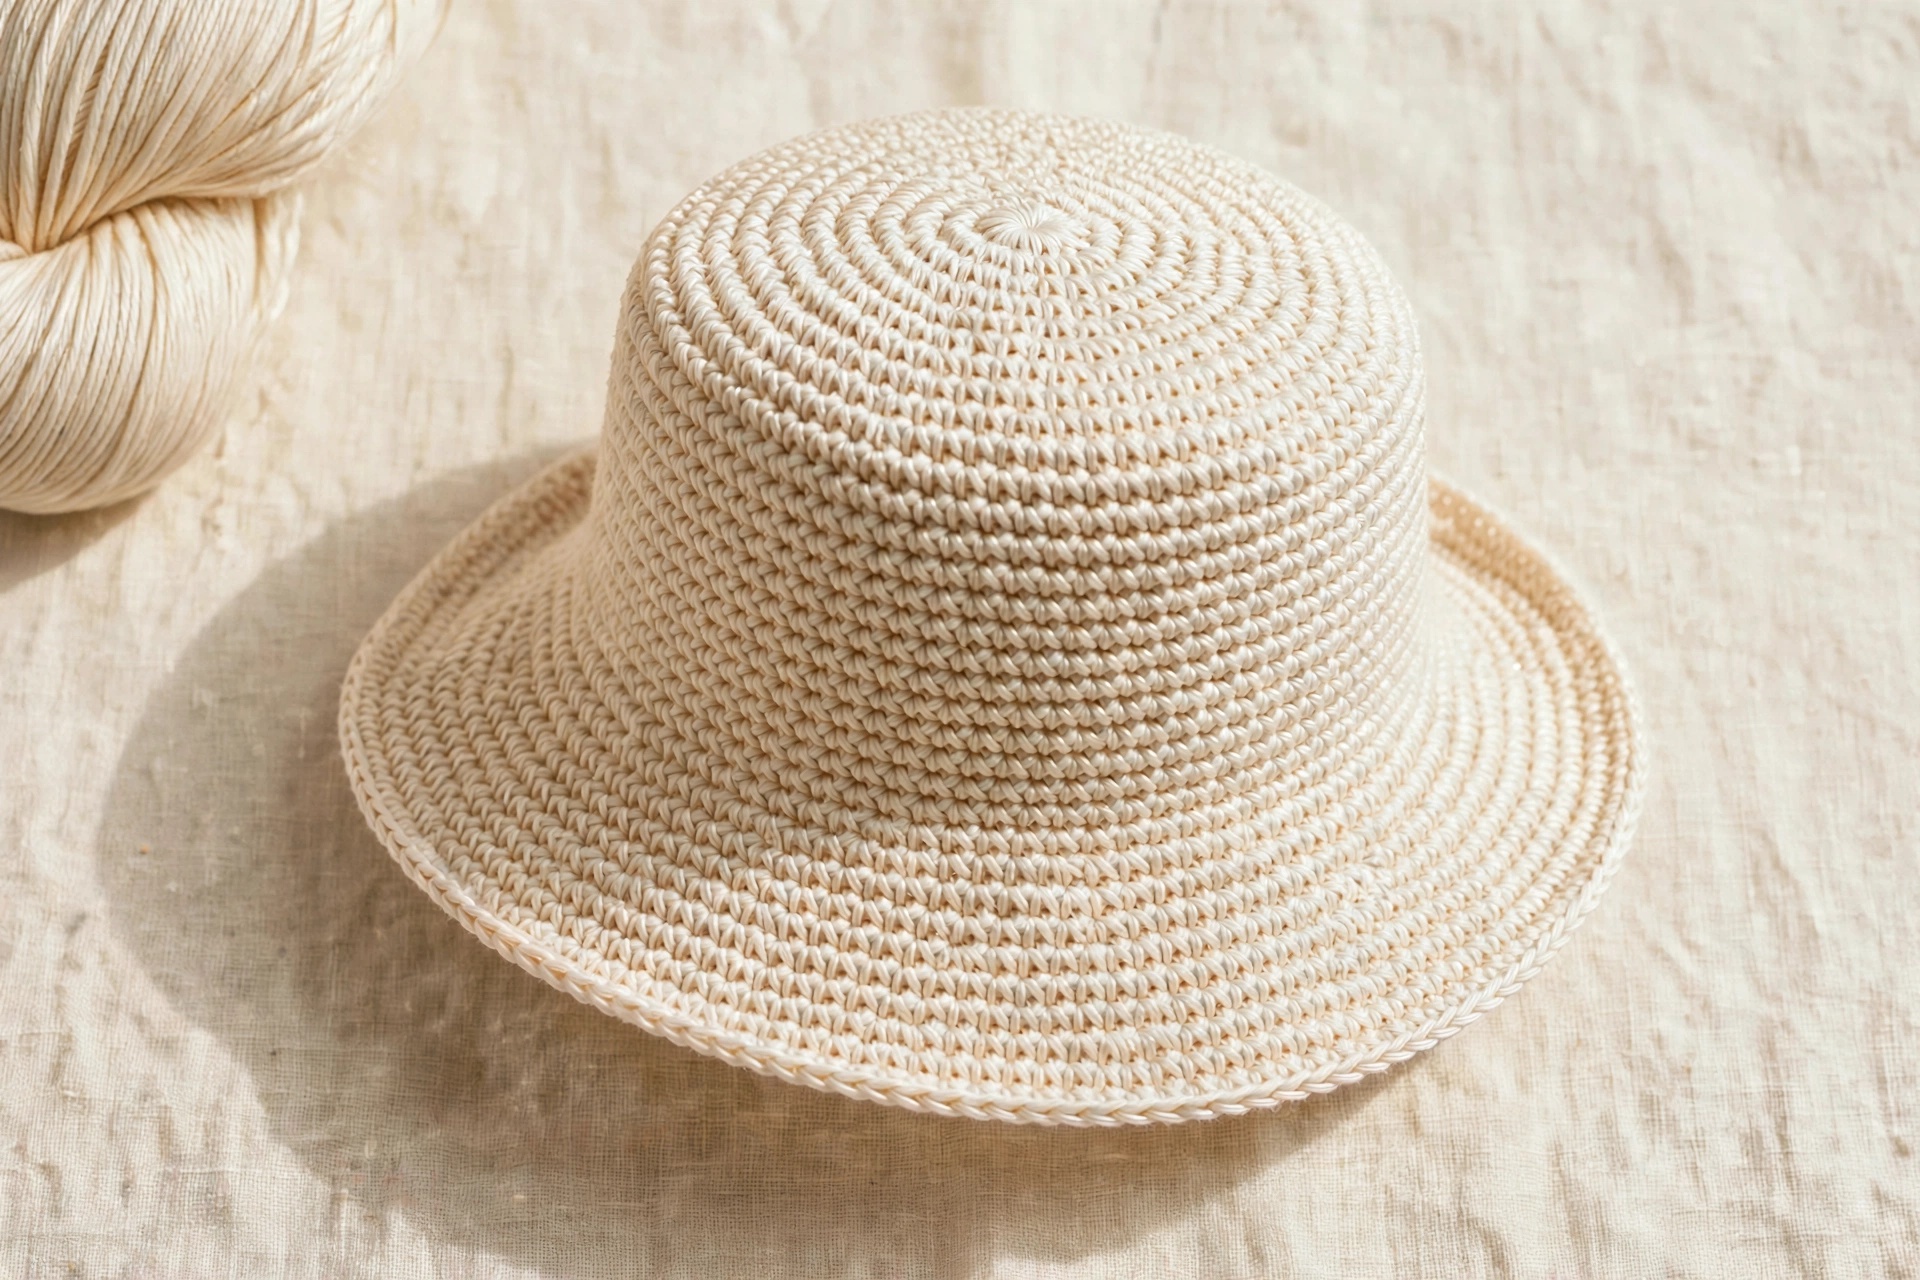
Materials & Preparation
Choose a yarn that has enough structure to hold the shape of the hat while remaining comfortable against the head. Cotton and cotton-blend yarns are especially useful for a structured bucket hat, while softer blends can give you a more relaxed drape.
- Medium-weight crochet yarn
- Matching crochet hook appropriate for your yarn
- Yarn needle
- Scissors
- Stitch marker
- Tape measure
You can use one color throughout the hat or introduce a contrasting color around the brim. A striped crown and solid brim also make a simple way to personalize the finished piece.
Gauge & Sizing
Gauge is useful because the circumference of the crown determines how the hat will fit around the head. Your exact stitch count may vary depending on yarn, hook size, and tension.
For a custom fit, measure around the head where the finished hat should sit. Compare that measurement with your growing crochet circle before moving into the side section.
US Crochet Abbreviations
- ch — chain
- sl st — slip stitch
- sc — single crochet
- hdc — half double crochet
- dc — double crochet
- st — stitch
- inc — increase
- rep — repeat
Step-by-Step Crochet Bucket Hat Pattern
Step 1 — Start the Crown
Begin with an adjustable ring so the center of the crown can be closed neatly. Work your first stitches into the ring and pull the yarn tail gently to close the opening.
Place a stitch marker at the beginning of the round if you are working continuously. This makes it much easier to keep track of your increases.
Step 2 — Build the Circular Crown
Continue working rounds while gradually adding increases. The purpose of these increases is to keep the crochet piece flat while expanding the diameter of the crown.
Spread your increases evenly around each round rather than placing them all in the same area. Even spacing helps prevent the crown from developing obvious points or ripples.
Step 3 — Stop Increasing
Once the crown reaches the desired width, continue working around without adding increases. These rounds create the vertical sides of the bucket hat.
Keep your tension consistent during this section. If your stitches become noticeably tighter or looser, the sides can begin to flare or narrow unexpectedly.
Step 4 — Check the Hat Depth
Try the hat on or compare it with your head measurement. Continue working rounds until the sides reach approximately where you want the brim to begin.
A shorter side section creates a more casual shallow bucket hat. Adding additional rounds produces a deeper fit with more coverage.
Step 5 — Begin the Brim
The brim is created by gradually increasing the number of stitches around the outside edge. Increase evenly so the brim expands smoothly instead of developing waves.
For a flatter brim, use smaller increases distributed across more rounds. For a more dramatic floppy brim, add width more quickly.
Step 6 — Shape the Final Brim
Once the brim reaches the desired width, work one or more rounds without increasing to stabilize the edge. A final round in a slightly tighter stitch can also help the brim hold its shape.
Finishing the Hat
Fasten off securely and weave the yarn tail through the inside of the hat. Trim the excess yarn only after the end is secure.
Light blocking can help settle the crown and brim into a clean shape. If you used cotton yarn, gentle steam or damp blocking can be useful, but avoid stretching the hat more than necessary.
Ways to Customize Your Bucket Hat
- Use two or more colors for stripes.
- Add a contrasting band around the crown.
- Make the brim narrower for a subtle look.
- Make the brim wider for more sun coverage.
- Add a simple embroidered detail or crochet flower.
Troubleshooting
If the crown curls upward, you may need additional increases. If it develops waves, you may be increasing too quickly. If the sides flare before the brim, check that you have stopped increasing at the correct point.
If the finished hat feels too tight, try a larger hook or add another crown increase round. If it feels too loose, reduce the crown diameter or use a slightly smaller hook.
Final Notes
The best part of making a crochet bucket hat is how easy it is to adjust the fit while you work. Keep checking the crown diameter, side depth, and brim width, and you can create a hat that suits your measurements and style.