Crochet Bag Charms
Make tiny crochet charms for a handbag, backpack, zipper pull, keys or gifts. This long-form guide gives you five complete motifs—daisy, strawberry, cherries, sunflower and heart—plus a secure hanging loop and finishing method.
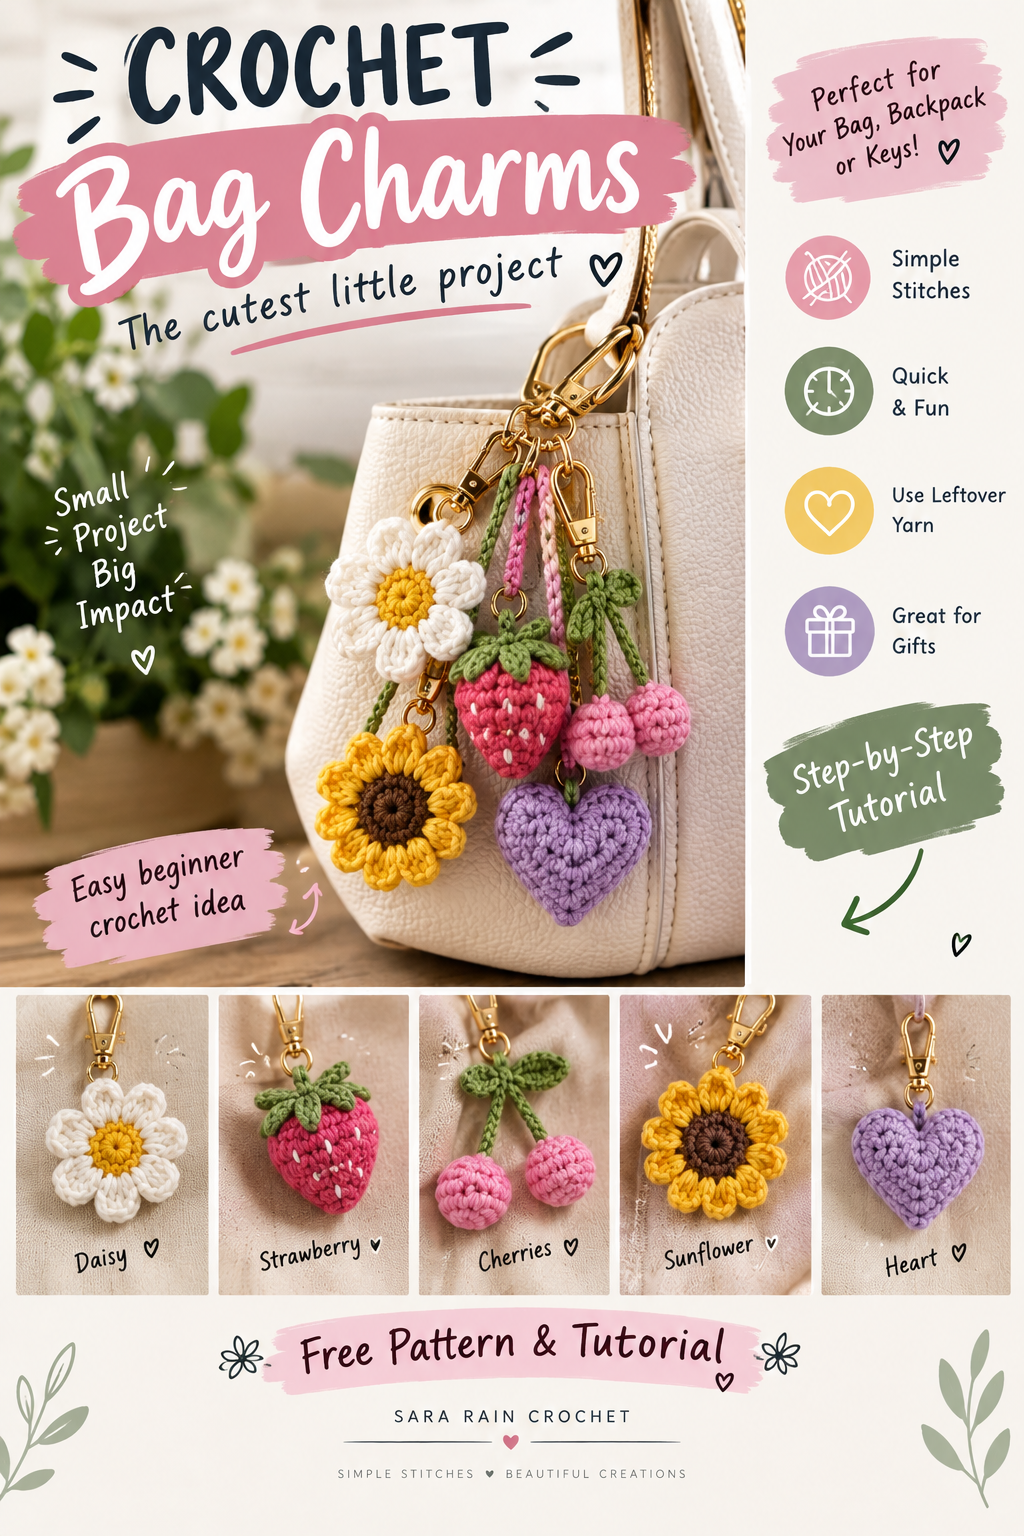
These are intentionally small projects. They are useful for leftover yarn, quick gifts and practice because every stitch is easy to see. The most important part is not speed: keep the fabric firm, shape the pieces carefully and reinforce the hanging loop so the finished charm can survive being moved around on a real bag.
Materials, tension and abbreviations
Materials
- Small amounts of worsted / medium #4 yarn.
- 3.0–3.5 mm crochet hook.
- Polyester fiberfill for the stuffed shapes.
- Tapestry needle, scissors and a stitch marker.
- Lobster clasp, split keyring or swivel hook.
- Optional embroidery thread for seeds or tiny details.
Tension
There is no formal gauge. Aim for a compact fabric with no visible stuffing. If the stitches look open, use a smaller hook. If your hook is difficult to insert, go up 0.5 mm.
Use the same hook throughout each charm. Consistent tension matters more than matching an exact measurement.
Make a secure hanging loop
For most charms, the loop can be added after the motif is complete.
- Attach yarn at the top-center of the charm and leave a 15 cm / 6 in tail.
- Chain 12. For a larger clasp, chain 14–16.
- Slip stitch back into the attachment point to form the loop.
- Slip stitch into the next available stitch, if possible.
- Fasten off and use the tail to sew through the base of the loop several times before weaving it into the body.
Daisy bag charm
The daisy is the quickest motif and makes an excellent first charm.
Yellow center
6 sc- Make an MR with yellow yarn.
- Work 6 sc into the ring.
- Pull closed and slip stitch to the first sc. Fasten off.
Six petals
6 petals- Join white yarn in any center stitch.
- In that stitch work sl st, ch 2, 3 dc, ch 2, sl st.
- Repeat the same petal in each of the remaining five center stitches.
- Slip stitch to the first petal base, fasten off and weave in the ends.
Add the hanging loop at the top between two petals. If the petals curl, loosen the chain-2 sections and gently flatten the finished flower.
Strawberry bag charm
This stuffed berry uses simple increases and decreases. Do not overstuff it; a little compression gives a better strawberry shape.
Body
6 → 24 sc- With red or pink yarn, make an MR and work 6 sc.
- Round 2: inc around. 12 sc.
- Round 3: [sc, inc] around. 18 sc.
- Round 4: sc around. 18 sc.
- Round 5: [2 sc, inc] around. 24 sc.
- Round 6: sc around. 24 sc.
Taper
18 → 6 sc- Round 7: [2 sc, dec] around. 18 sc.
- Round 8: [sc, dec] around. 12 sc.
- Add a small amount of fiberfill.
- Round 9: dec around. 6 sc.
- Cut yarn, draw the tail through the six remaining stitches, pull closed and weave through the body.
Leafy top
- Join green yarn at the top.
- Repeat five times: ch 3, sl st in the 2nd and 1st chain from hook, sl st into the next top stitch.
- Fasten off and reinforce the top.
Seeds
Use cream yarn and short diagonal embroidery stitches, about 3–4 mm long. Scatter them rather than putting them in perfect rows.
Cherry pair bag charm
Make two small cherries and join their stems so both fruits hang from one clasp.
Each cherry
6 → 12 → 6 sc- Make an MR with red or pink yarn and work 6 sc.
- Round 2: inc around. 12 sc.
- Round 3: sc around. 12 sc.
- Add a tiny amount of stuffing.
- Round 4: dec around. 6 sc.
- Cut yarn, close the six stitches with the drawstring method and weave in the tail.
Stems
- Join green yarn to the first cherry and chain 8.
- Slip stitch back down the chain to the cherry.
- Make another chain-8 stem and attach it to the second cherry.
- Join the two stems at the top with a slip stitch.
- Chain 12 for the hanging loop and slip stitch back to the stem junction.
- For a small leaf, chain 5, then work sl st, sc, hdc and sl st back along the chain and attach its base to the junction.
Sunflower bag charm
This is the warmest version of the collection: brown center, golden petals and optional cream outer petals.
Brown center
8 sc- Make an MR with brown yarn.
- Work 8 sc into the ring.
- Pull closed and join with a slip stitch. Fasten off.
Golden petals
8 petals- Join golden yellow yarn in any center stitch.
- Work sl st, ch 2, 3 dc, ch 2, sl st in that stitch.
- Repeat in each of the remaining seven center stitches.
- Join, fasten off and weave in the ends.
For a fuller flower, work a second layer of petals behind the first using cream yarn. Keep the second layer loose enough that the flower stays flat.
Add the hanging loop at the top center and reinforce its base with several needle passes.
Mini heart bag charm
This compact one-round heart is ideal for a zipper pull or as the smallest member of a mixed charm set.
One-round heart
magic-ring motif- Make a magic ring.
- Chain 3.
- Into the ring work 3 tr, 3 dc, ch 1, 1 tr, ch 1, 3 dc, 3 tr.
- Chain 3 and slip stitch into the center of the ring.
- Pull the ring closed firmly.
- Fasten off with a long tail and use the tail to neaten the center dip before weaving it through the back.
Attach hardware and finish the charm
Lobster clasp
- Pass the crochet loop through the eye of the clasp.
- Pull the charm through its own loop to form a lark's-head attachment.
- Check that the clasp closes fully.
Split keyring
- Open the ring only enough to insert the crochet loop.
- Slide the loop all the way around the metal ring.
- Close the ring completely.
Zipper pull
For a crochet pouch or pencil case, use a shorter 8–10 chain loop. Keep it close to the zipper so it does not catch while the pouch is opened.
Stitch-count and size checkpoints
| Charm | Checkpoint | Approx. size |
|---|---|---|
| Daisy | 6 center sc; 6 petals | 5–6 cm |
| Strawberry | 6, 12, 18, 18, 24, 24, 18, 12, 6 | 5–7 cm |
| Cherry | Each: 6, 12, 12, 6 | 3–5 cm |
| Sunflower | 8 center sc; 8 petals | 5–7 cm |
| Heart | One compact motif | 4–5 cm |
Measurements vary with yarn and tension. For a coordinated set, use the same yarn weight and hook size for every charm.
Troubleshooting
Use a smaller hook or tighten your tension. Do not compensate by overstuffing because that can make the holes larger.
Check the increase and decrease rounds and reduce the stuffing. The berry should be widest through its middle.
Relax your tension around the chain-2 sections. Flatten the finished flower gently while damp if needed.
Move the loop to the true top center and reinforce two neighboring stitches rather than attaching to one stitch only.
Use a longer chain loop and reinforce its base with multiple passes of the yarn tail. The metal should sit through the loop, not directly through a single crochet stitch.
Colors, care and variations
Build a themed collection
- Garden: daisy + sunflower + green accents.
- Fruit: strawberry + cherry pair.
- Pastel: lavender heart + cream daisy + blush strawberry.
- Autumn: mustard sunflower + rust heart + deep red berry.
- Scrap yarn: keep the construction consistent and change only the accent colors.
Care
Spot-clean first. If the yarn label allows washing, hand wash gently in cool water, press excess moisture out in a towel and air dry completely before returning the charm to a bag.
Gift idea
Make three coordinated charms and package them as a handmade accessory set. A single charm also works as a zipper pull on a pouch, project bag or pencil case. Because each design uses very little yarn, this collection is a practical way to use leftovers.
Save this tutorial for your scrap-yarn box and mix the motifs however you like. The same five shapes can look completely different with a new palette, clasp or bag.